Search the knowledgebase
Knowledgebase
- Employees Short Tour
- Start your personal development
- Help each other develop
- Security & GDPR
- Teamcoach Short Tour
- Managing employees
- Admin Short Tour
- Organize the environment
- Admin Managing employees
Employees
Teamcoach
Admin
Making a template
This is possible for: admins
This is not possible for: team coach, professional
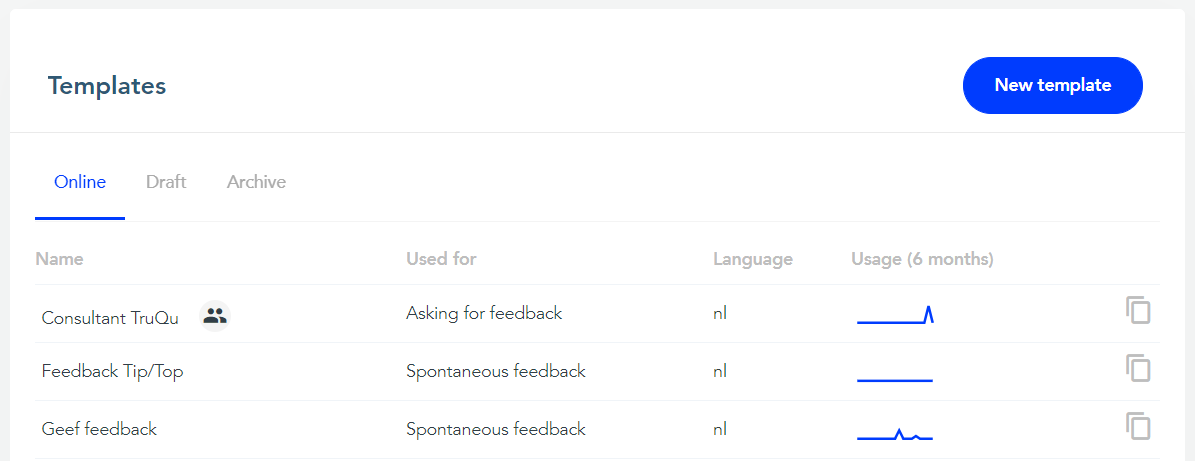
Template overview
You can find the link to all templates in the ‘Admin’ menu item’s dropdown menu. You’ll see tabs when you open the template module: ‘Online’, ‘Draft’, and ‘Archive’.
Online
The online templates are active and can be used by everyone. In this overview, you also see how many times a template has been used in the past six months. This makes it easy to distinguish the many used templates from the (almost) non-used templates which you can then renew or archive.
If you want to make adjustments to a current online template, you can duplicate that template. Then, after you make the adjustments, you can archive the original template. With this method the data of a template is always pure.
Draft
When you make a new template, you can always save it as a draft and continue creating it whenever you want. With a draft there is no need to duplicate the template to make adjustments. Draft templates can’t be used yet; if you want a one to be used, you’ll need to publish it.
Archive
Archived questionnaires are ones that have been used and that you don’t want to use anymore. You can always publish archived questionnaires again.
New template
Let’s start creating a template! To start making a new template, click the ‘New template’ button.
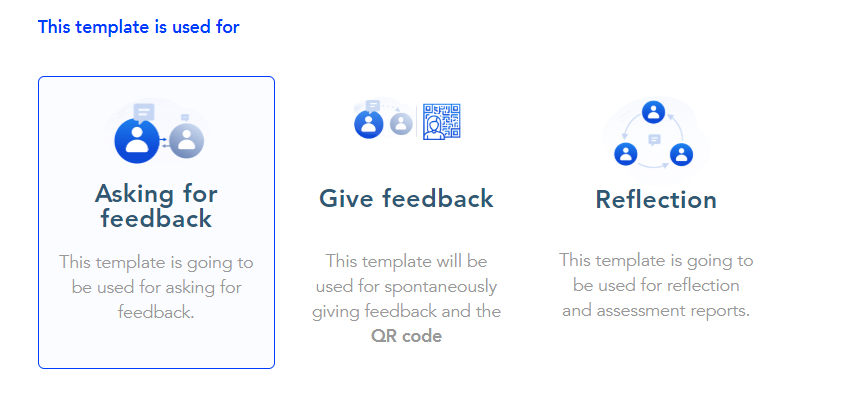
This template is used for
Start by selecting what you want to use the template to be used for: ‘Asking for feedback’, ‘Give feedback’ or for a ‘Reflection’. Reflection includes both self-reflections and organized reflections.
Choose the transparency of the template
This option gives the possibility to make all of the feedback from this template be either private or transparent. If you decide to make the template transparent, all the data will be visible for both the admins and team coaches. The professional is updated about the template being transparent.

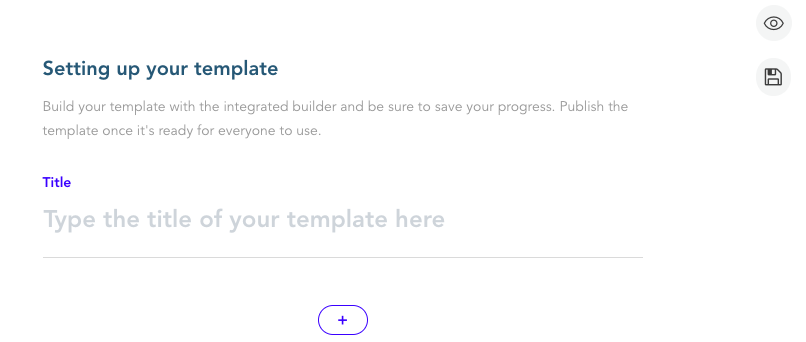
Content template
Now you can start creating the template. Everything you create below is visible to the person who fills in the template. You start with the title of your template. You can then click on the plus sign to open the element bar. Here you can add new elements to your template.

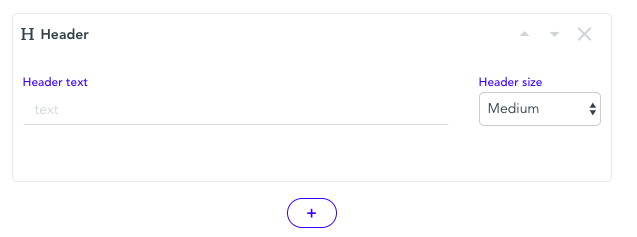
Header
The first element is a header. You can use this to place (intermediate) headings in your questionnaire to give structure to your list. This allows you to indicate that you are going to the next topic of the template, for example.
Text
The second element is a text. You can use this to ask a question or to provide a description. After creating a question using a text element, you can add a new element to indicate what answer option follows the question. You can choose from an open question, a rating, a slider or a multiple choice entry.
Answer field
The third element is an answer field. This can be added below the text in which a question is asked in order to create an open question. This is therefore different from the “text” element. Use “Answer field” to create an answer option. “Text” is used to ask the question or to give a short description above an answer option.
Rating
The fourth element is a rating. With a rating you give the respondent the opportunity to answer a question with the help of a scale.
Slider
The fifth element is a slider. With this you can add an answer option under a question to give a scale between 1-10 or 1-100.
Multiple Choice
The last element is a Multiple Choice entry. You can indicate which answers the respondent can choose.
Publish, Save or Cancel
You will see three options at the bottom of the template. With ‘publish’ you put the template live and can be used. By clicking on ‘save’, you save the concept and you can change it later. By ‘canceling’ you go back to the template list and do not save it.